
Related to my previous post (found here: https://www.creakmon.com/learning-arm-templates-my-first-step-into-azure-infrastructure-as-code/), I found out that Azure also supports another native Infrastructure as Code (IaC) tool called Bicep. Thankfully, it looks like the people over at Microsoft realized that trying build and reading an ARM Template using JSON is not considered a good time so they created Bicep as a cleaner and easier way to define Azure resources.
And of course, after finding this out, I decided to learn it and play around with it.
Here is the Bicep file that I created called main.bicep:
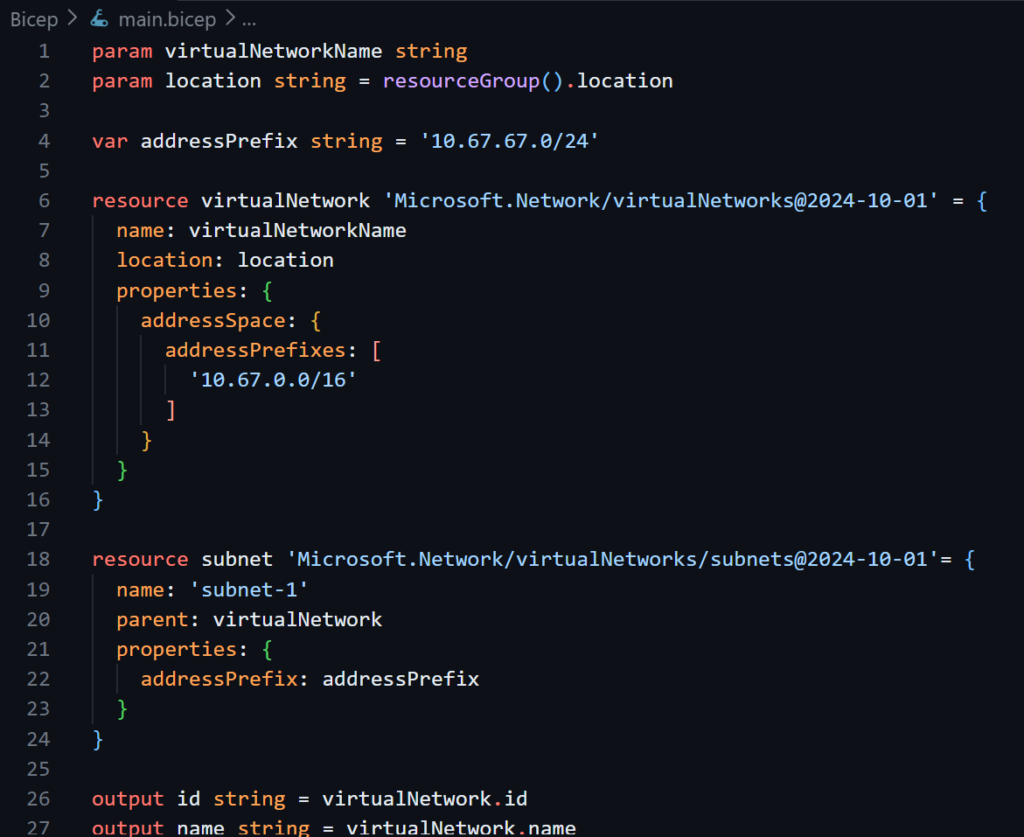
This Bicep file deploys a virtual network with a subnet inside it. As you can see, the format of Bicep is much more readable compared to ARM Templates. One thing to note is that Bicep is much closer to programming in terms of syntax and logic. With that said, we’ll go over the file from top to bottom.
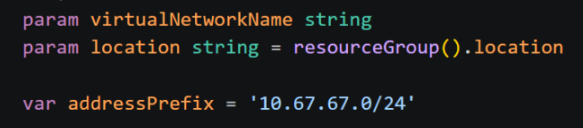
Parameters allow us to specify values at deployment time, which helps us avoid hard-coding values that may change between deployments, such as unique resource names. We have two parameters: virtualNetworkName and location. After the param keyword and parameter name, we also specify the parameter type. In this file, we are using string, but Bicep also supports other types such as int for numbers or bool for Boolean values.
You can also set a default value for a parameter using the equals sign. For the location parameter, the default value is resourceGroup().location. This calls the resourceGroup() function and uses the location property of the resource group where the Bicep file is being deployed. Functions are outside the scope of this post, but if you are familiar with programming, then the concept should feel familiar. Basically, the resource group’s location becomes the default value for the location parameter.
After the parameters, we have variables. Variables are similar to parameters because they also allow us to store values. The difference is that variables are defined inside the Bicep file itself, not provided during deployment. This means that if you want to use a variable, you need to assign its value in the file using the equals sign. We only have one variable in the file, which we specified with the keyword var, named it addressPrefix and assigned the value of ‘10.67.67.0/24’.
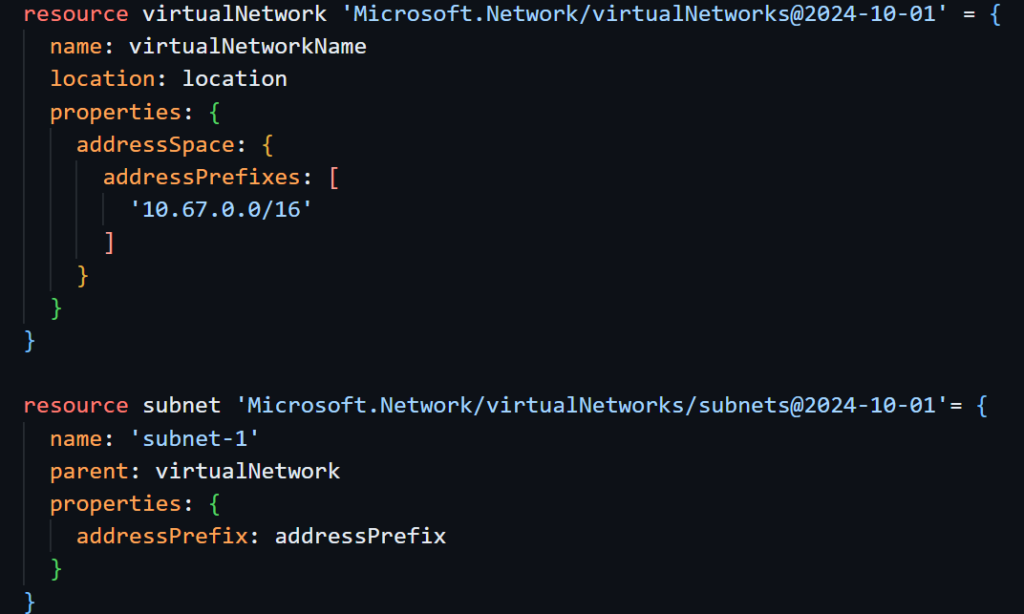
Now onto the meat of the Bicep file! We can use the resource keyword to specify the Azure resource that we want to deploy. As mentioned before, we will be deploying a virtual network and attaching a subnet to it. After the resource keyword, we need to specify the symbolic name of the resource. It’s important to note that this name is not the actual name of the resource in Azure but a symbolic name that is only used in the Bicep file. After specifying the symbolic name, we specify the resource type that we want to deploy. For the two resources that we specified, it would be ‘Microsoft.Network/virtualNetworks@2024-10-01’ and ‘Microsoft.Network/virtualNetworks/subnets@2024-10-01’. The date after the @ symbol is the API version that Bicep uses when it creates the resources.
Once we specify the resources that we want to deploy, we can customize their properties and attributes. For the virtualNetwork resource, we specify its name, location and properties. For its name, we use the virtualNetworkName parameter that we specified at the start of the file (we will enter the parameter before deploying the file). For the location attribute, we use the location parameter. Then we specify the IP address prefix for the Virtual Network with addressPrefixes.
The subnet resource is similar. We specify the name, parent resource, and addressPrefix. Note that in the virtualNetwork resource, we specify the IP address prefix directly in the addressPrefixes array. In the subnet resource, we use the addressPrefix variable that we defined earlier in the file.

Lastly, we can use the output keyword to display specific values after the deployment completes. Here, we will output the id and name of the virtualNetwork resource.
Now that we understand what the Bicep file does, we can deploy it! Once again I will be using Azure PowerShell to deploy this Bicep file and conveniently, we can use the same command that we use for the ARM Template. To deploy the Bicep file, we will use the command New-AzResourceGroupDeployment with the virtualNetworkName parameter that we specified in the Bicep file to name our virtual network.
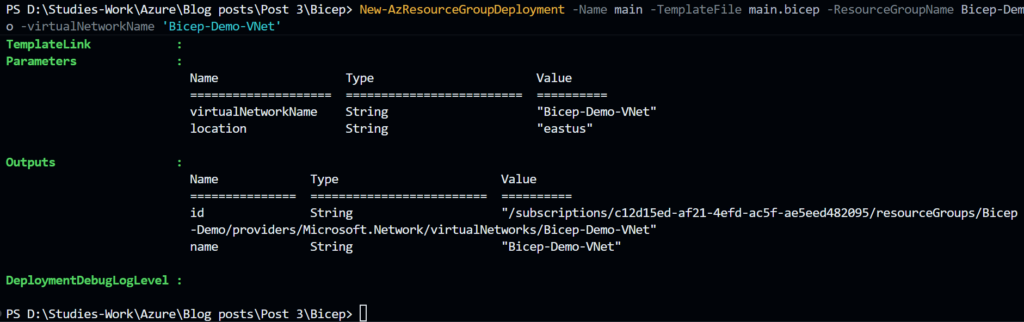
In the output of the command, we can see the outputs we specified in the Bicep file, so the id and name of the virtual network.
Finally, we can check the Azure portal to confirm that the resources were successfully deployed.

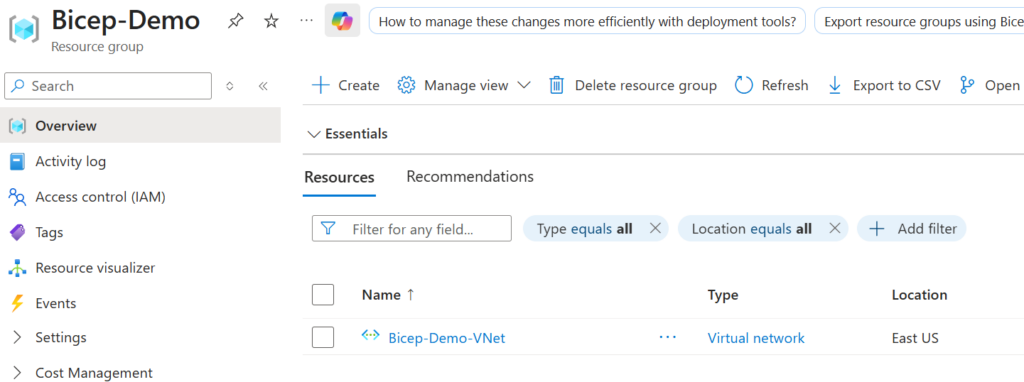
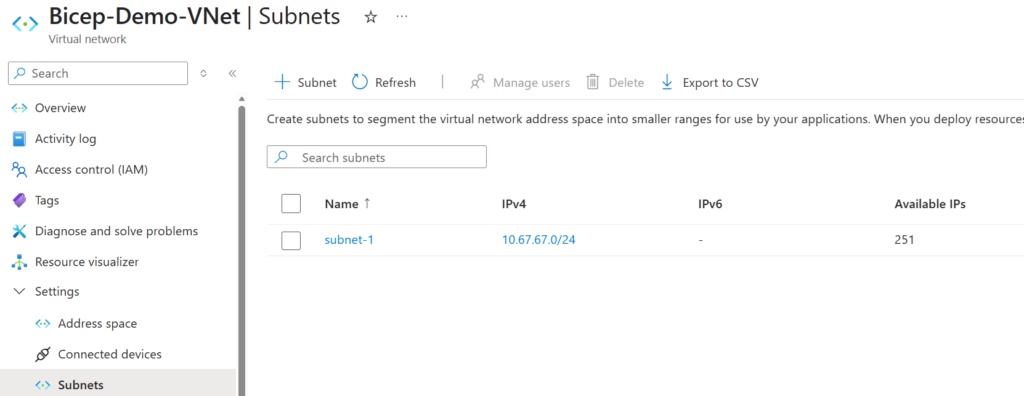
There we go! We successfully deployed a virtual network and subnet using a Bicep file. After working with both ARM Templates and Bicep, I can definitely see why Bicep is the better option for most Azure IaC work. It uses the same Azure deployment model behind the scenes, but the syntax is cleaner, easier to read, and much easier to maintain as deployments grow. For a small demo like this, the difference is already noticeable. For larger environments, that readability matters even more.
My recommendation is simple: if you are starting with Azure IaC today, learn Bicep first. ARM Templates are still useful to understand, but Bicep is the tool I would actually want to write and maintain.
Sources:
https://learn.microsoft.com/en-us/training/modules/build-first-bicep-file/
https://github.com/jamesmcroft/bicep-templates/tree/main/networking
https://learn.microsoft.com/en-us/azure/templates/microsoft.network/virtualnetworks?pivots=deployment-language-bicep
https://learn.microsoft.com/en-us/azure/templates/microsoft.network/virtualnetworks/subnets?pivots=deployment-language-bicep